Search This Blog

Monday, April 6, 2020

Quarantine Kitchen: A Sauce That Goes With Everything (Except Maybe Dessert)

Do you know what this is?

I’ve decided not to number each dish or recipe or even each Quarantine Kitchen post individually. What if the numbers reached triple digits? That would be disheartening, wouldn’t it? So I’ll just go along from now on, one day at a time, combining more than one experiment into each post. Today, for example, I have to report one blazing success, one save, and one near-complete flop. I’d call that last a complete flop, except that my quarantine partner was happy with the results, and we did eat them. First, however, the success.

“What is it?” neighbor Therese asked during our walk with dogs, when I told her neighbor Dorothy had suggested I make a batch of chimichurri with parsley from her, Dorothy’s, greenhouse. I’d never heard of chimichurri before and was reminded of a song from the “Mary Poppins” (the movie) sung — well, performed — by Dick Van Dyke. 

I packed that quarter-cup measure full

When you look up chimichurri, as I know you will and I encourage you to do, you’ll learn that it is an Argentinian sauce, used as often in Argentina as red and green salsa are here in the borderland, though it has more in common with Italian pesto. You’ll also quickly realize that there is great controversy about which ingredients may be included, which must be, and which would make any self-respecting Argentinian roll over in his or her grave. For instance, one recipe I read online got five stars and raves in the form of “I love this recipe!” from several readers, while others were outraged and said it was “not chimchurri at all!”

Maybe mine was "not chimchurri at all" — who am I to judge? — but I can tell you that we loved it!


I have no food processor but am now possessed of a simple blender, and that would have to do. Chopped fresh parsley (1/4 cup), chopped garlic (4 big cloves), balsamic vinegar, salt, crushed red pepper, and oregano went into the blender. 

Right from the start, though, I had to make adjustments in the basic recipe I'd chosen to follow: (1) With no red wine vinegar on hand, balsamic vinegar would have to do; however, it is a very strong-flavored vinegar, so (2) I reduced the three tablespoons to two tablespoons and added a tablespoon of water to make up the difference. Also, (3) as I had no oregano leaves but only ground oregano (oregano molido), I cut that amount in half as well. (4) Olive oil was to be added only when the parsley mixture went from food processor to bowl, but in my case, as it began in the blender I added some of the olive oil then and there, for the sake of consistency. 

Getting all that in the bowl at last, I added the remainder of the olive oil, after which it had to sit 10 minutes before being stirred. The suspense was nerve-wracking! After stirring and a tiny, tentative taste, there was still the suspense of how the sauce would work to complement the evening’s chicken. 

With olive oil floating on top before stirring

The photo at the top of the screen today is the final product. 

I neglected to photograph the plated dinner but can report that the the sauce was delicious not only on the chicken but also on the sweet potato and steamed broccoli! And that the following evening it brought a fresh tomato salad to sparkling life! Dorothy tells me it’s good simply spread on bread, so there’s something we can try in the days ahead.

Chimichurri — resounding success in the quarantine kitchen and something that will spark up our meals for, I hope, many years to come!


Something else, an experiment that was disappointing on the first day, turned around and became (surprisingly) glorious by the second. I had been preparing an entire post on bananas and how there’s more you can do with them than make banana bread. For example (and I have photographs for these), banana pancakes. For a more obvious example, fruit smoothies.

Handy new blender again
I make my own yogurt at home during the months my bookstore is closed, but one of the tricks of making yogurt is to avoid ultrapasturized milk. Sadly, the last time I shopped, all I could find was ultrapasteurized. What would happen? I tried and found out. The yogurt did not set up but had a runny, gooey, gluey consistency. Oh, well, I could put it on my granola, couldn’t I? And how could it hurt a fruit smoothie?

Substandard homemade yogurt, a couple of very ripe bananas, mango-coconut juice, a handful of blueberries and a handful of raspberries from the freezer all went into the blender. The result was drinkable. The taste was all right. The consistency, however, was disappointing. Not like a smoothie at all. My quarantine partner (known in my main blog as the Artist) turned down the offer of a disappointing smoothie, and I couldn’t blame him at all.

Not the best I've ever made
But waste not, want not. I am my grandmother’s daughter! Into the fridge it went. And lo and behold! The next day the consistency and texture had undergone a transformation! My smoothie (and it still tasted good) had become rich and thick and velvety smooth. Very satisfying!

A miracle!

I’ll note one more experiment but without a single image and without detailing the foolish improvisation I made that led to failure. The experiment was cheese popovers. Cheese popovers were one of my mother specialties, and for years someone has entreated me to make them for him. Okay, it felt like the time had come. We needed a treat. Long story short: they didn’t pop. I have figured out what I did wrong, though, and the next time will be a success — with pictures.

Thanks for visiting. Hope you are managing to enjoy a few experiments in your quarantine kitchen. -- I should say "sheltering-in-place kitchen" but the sound works better with the stronger word.


Thursday, April 2, 2020

Quarantine Kitchen, Episodes #2, #3, #4: Treats and Exercise Together


Kale on the left, parsley on the right
I'm going to try to condense several projects into one post because, really, how many words do I need to accompany food photos? The beautiful fresh greens above came to us courtesy of a neighbor here in Dos Cabezas who has a flourishing greenhouse. Well, she did lose tomato plants to the last killing frost, but she still has plenty of bounty to share. So I decided to take the kale by the leaves and make roasted kale chips, a snack my stepdaughter Maiya swears by. Here's how it went.

Remove stems
The stems are bitter, and you don't want them. Also, to remove bitterness from the leaves, the part you do want, you drizzle them olive oil and massage it in. Yes, massage. I know. Weird. Never thought I would be massaging a vegetable. 

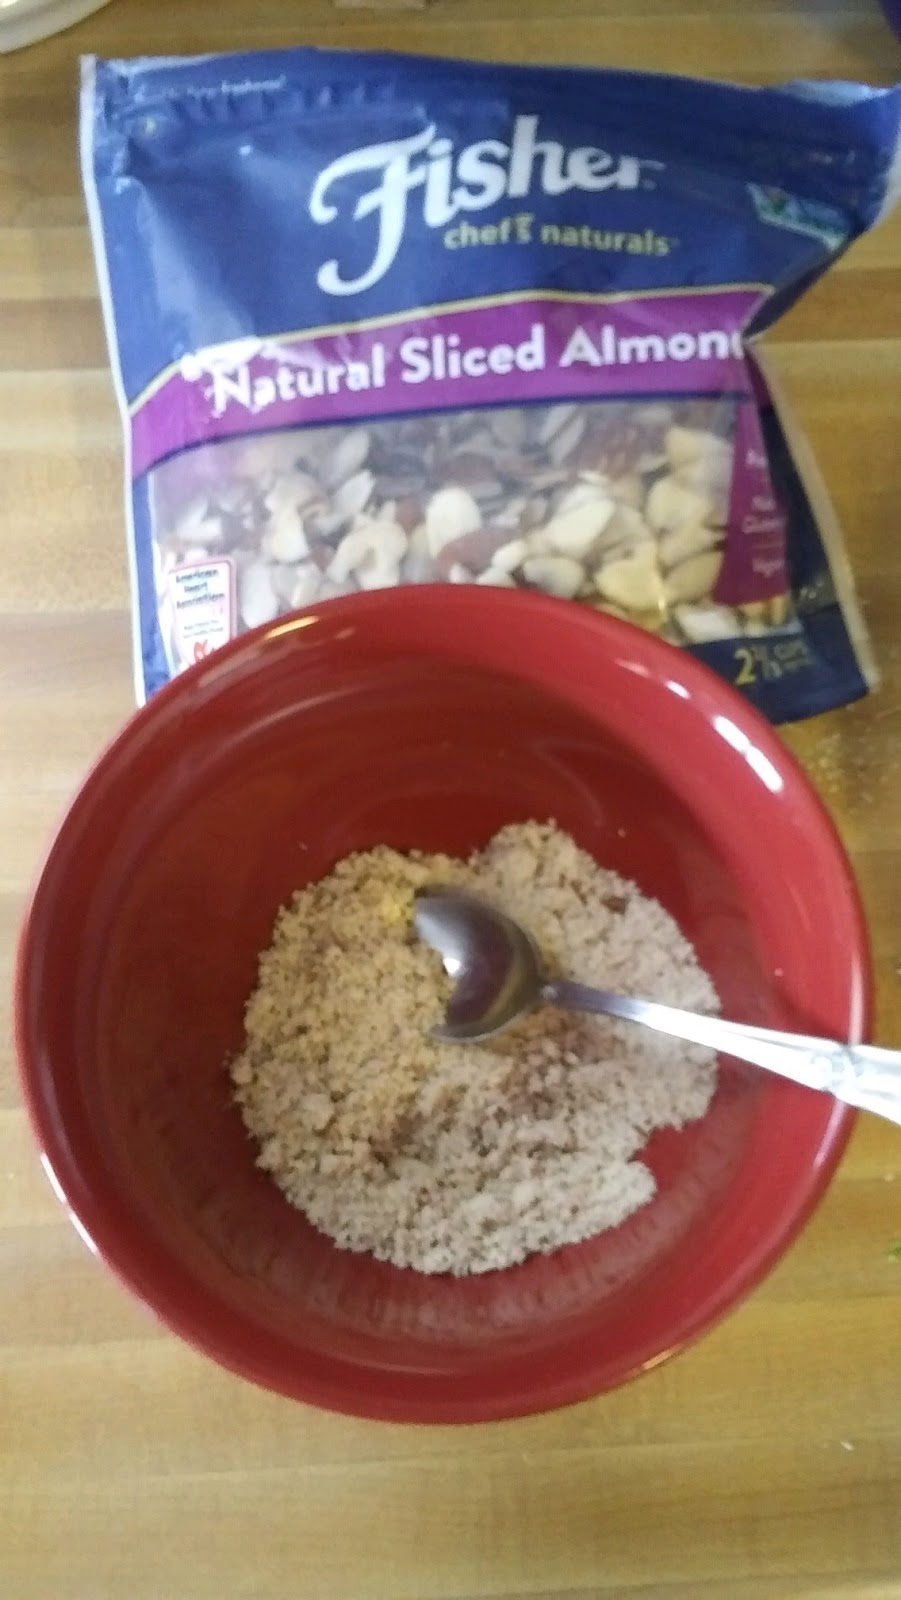
Some recipes I consulted use only salt. Some recommend sea salt and cumin, and I liked the sound of that. Another possibility was garlic salt, but I didn't go that route. What do you like, and what spices do you have on hand? An idea I really liked was dusting almond flour for added crispness, but I didn't have almond flour. I thought of cornmeal, but the only cornmeal in my cupboard right now is a rather insipid variety, not the Bob's Red Mill stuff I much prefer. So I ground up slivered almonds in my spice grinder to make 1/4 cup of what I called almond flour, added sea salt and cumin and tossed the olive oil-coated kale leaves with it.


Next, spread them out on a sheet for the oven. Maiya had said a 200 degrees Fahrenheit, one recipe said 315, so I split the difference and set the oven at 250.


How did the kale chips turn out? They are very fragile and delicate, for one thing. We liked them. But my husband pronounced them -- and I did not even know this word was in his vocabulary; have never heard him use it before -- oversalted! Okay! Less salt next time!


The parsley went into tabbouleh, one of my personal favorites, although there was no cucumber in it this time. I don't mind buying green bananas and having them go brown, but a cucumber that goes soft in the fridge isn't good for anything that I can see. And while I was sure I had photographed the tabbouleh at a couple of stages, plus in a pita pocket with yogurt, I don't find those photos. Okay, I've got one image of the last bit of tabbouleh. It didn't last long. 


But here's a thought I had. Massaging kale -- does that count as exercise? Did I cover two health birds with one kitchen project?

Not all our treats are green, but exercise comes in more vigorous forms than massaging kale. What about creaming butter and sugar together with a wooden spoon for chocolate chip cookies?


Then mixing in all that flour, again by hand! I'm calling it exercise, friends. And greasing twelve separate little cookie beds in a muffin tin? More exercise. You do it your way, I'll do it mine. 


We like the crispy results
One more closing thought on treats and exercise: making bagels involves a good, long ten minutes of kneading, and when kneading dough by hand you realize just how long ten minutes can be. That counts as exercise, for sure -- and there are the delicious bagels at the end of the project. I wasn't sure the ones I made last weekend were my best-ever bagels, but revisiting them, as we did daily until all 12 were gone, I gave myself higher marks each day. (For entire wordless bagel story, see here.) They were delightfully crispy and chewy and, wow, just so worth the effort! 


Last two bagels! Time to make more!


Sunday, March 22, 2020

Quarantine Kitchen, Episode #1

Isn't food beautiful?
Life has changed all over the world in only a few short weeks. Those of us not under quarantine or self-quarantine are under directions to “shelter in place,” to keep to our homes and practice “social distancing.” The global coronavirus pandemic has brought us this new vocabulary. Its consequences have people trading bread recipes on Facebook and getting together for a glass of wine via Zoom (rather than in person) and leads all of us to thinking more and more about what is essential and what is not.

The last time I went grocery shopping, however, I admit I bought an inessential item: it was a small pot of succulents, $4.99, that I did not even try to resist. Several of my neighbors here in the ghost town of Dos Cabezas, Arizona, have gardens, and therefore while secluded at home they have the comforts of gardening, along with the comforts of cooking. We have no fence or wall around the grounds of our rented cabin and have never been here past the end of April (who knows what this year will require of us?), so I have no garden, except this small, round clay planter. The piece of rusty metal is something I picked up in the desert. Of stones the desert offers a wealth. This is my garden for what I have taken to call “the duration.” It feeds my soul.

Can't eat it, but I needed it

Books also feed my soul, of course, as they have all my life, but food is essential, and the comfort of meals feeds the soul, as well. The tantalizing aroma of banana bread is one I suspect fills many American houses these days. Our dinner last night was comfort food, too — meat loaf, potato, sweet potato, and the last of a broccoli salad as the green vegetable. 


Broccoli salad is something we have enjoyed for many years. It is basically chopped raw broccoli, chopped onion, chopped green olives, and mayonnaise. The original recipe included chopped hard-cooked egg, but I am conserving eggs these days; in the past I have substituted cubed tofu for the eggs to good effect, and most recently the pale, crisp stalks of bok choy filled the bill. I omitted the white this time around, but you don’t want to leave out something red. If you have pimiento-stuffed green olives, as called for in the original recipe (and where did that come from, anyway? I don’t recall), those will do. I did not, but diced red sweet pepper was fine instead.


Yum!
Broccoli salad is good all by itself, but you can stretch it out by serving it as a sandwich filling in pita bread. Warm the pita pockets before you fill them with the cold broccoli salad. It’s a nice, quick, and refreshingly different lunch.

[Note: Root vegetables and crucifers keep well — potatoes and sweet potatoes and yams; cauliflower, broccoli, Brussels sprouts. “No lettuce for the duration!” one friend of mine writes in e-mail, concerned about germs. I have long relied on bok choy for versatility, as the stalks substitute easily for celery and the leaves for lettuce or spinach.)

Here are my meat loaf ingredients: ground beef, Worcestershire sauce, chopped onion, rolled oats, eggs, catsup. Tomato paste would be more refined than catsup, but sometimes I prefer the sweeter condiment. Even in chili, I find the addition of catsup pleasing, however heretical the thought may be to chili purists. 


Double-yum!
Like the broccoli salad, leftover meat loaf too will go further if sliced thin and used as a sandwich filling. Because we’re all baking bread these days, aren’t we? Or about to start....

One of my kitchen essentials, as you already know, is Better than Bouillon. Another is a brand of tomato paste that comes in a tube rather than a can, because before I discovered that (thanks to a friend who included it in a gift basket once), there was always the problem of opening a can of tomato paste and not needing to use it all, but having what was left go moldy in the refrigerator or forgotten in the freezer. No such problem with the tube: take it out of the package, use what you need, keep the closed tube in the fridge until you need more. While I did resort to catsup in my meat loaf, our chicken entree the previous night simmered in a rich sauce of onions, garlic, olive oil, and tomato paste.


What else is essential in your quarantine kitchen? We would be hard pressed in our household to live without onions. Doesn’t almost every good recipe (other than banana bread, of course) begin with an onion?


And on the subject of bananas, now if ever is the time to buy green bananas. They will keep longer, in the first place, and in the second place you never throw away brown-skinned bananas, do you? Doesn’t they always go into the freezer until you’re ready to make banana bread?

Fresh fruit is important, too, if you have access to it, and citrus with its good, thick, protective rind is another good-keeping food. Berries are trickier, but I learned from one of my sisters years ago how to stretch out my blueberry supply. Wash the berries well and spread them out on a cookie sheet. Put the sheet in the freezer, and when the berries are frozen, remove them from the sheet with a spatula and transfer them to freezer bags. A handful at a time can be shaken from the bag (in all their nice, individual, original round form) to add to pancakes, cereal, smoothies, or salads. A couple of weeks ago I bought fresh raspberries and froze them the same way, so we’ll see how that experiment turns out.


Friends back in downstate Michigan report that skunk cabbage has made its spring appearance, so can rhubarb be far behind? Here in the high desert, we have “wild rhubarb,” or “desert rhubarb,” or “miners lettuce” (it has many other common names), which is not rhubarb at all but a species of dock, Rumex hymenosepalus. Leaves and stalks are edible, in salad when young or, later in their development, cooked like spinach. Roots, I read, were also used in the old days to tan leather or dye cloth. 

Miners lettuce in former mining town
With all the free-ranging cattle here in Dos Cabezas, I would hesitate to gather the desert rhubarb unless I were very, very hungry. And you’d certainly want to wash it well! But it’s always good to take note of emergency food supplies, should the kitchen run low, though I don’t think we will come to that in the current so-far manageable crisis.


Friday, March 20, 2020

Warning: Not At All Parisian!

My message of the day is simple: "For Satisfaction, Make Noodles!" It’s easy. It’s not much work. And you don’t need a pasta maker. I have one back in Michigan, but it’s no big deal to do without it. All you need is flour, salt, an egg, a little water, and a little oil. Some recipes leave out the water and oil. Really? I don’t recommend it.

Start with 2/3 cup of flour in a bowl and make a little well in the middle of it. Separately, mix the egg, a bit of salt, maybe a teaspoon of oil and a tablespoon of water. Pour that into the well, and stir the flour into it with a fork. I have an exact recipe back in Michigan, but without it on hand I winged my noodle dough, and as it seemed a wee bit dry while being worked, I added a sprinkle more water. Note: If not measuring makes you nervous, remember you can always add (e.g., salt or water), but you can’t take out again. —Though I guess if you sloshed in too much water or spilled in an excess of salt, you could add flour and hope for the best. Not sure about that.

But we digress.

What are those dark speckles?
I did something different with my dough the other day, something I hadn’t done before and hadn’t planned ahead this time, either. Because I had grated more nutmeg than necessary (it was so much fun!) to garnish our cheesy cauliflower soup the other night, I had a sprinkling left and was suddenly inspired to add that to the flour for my noodles! (Isn’t ‘noodles’ a wonderful word?) Whether you do this or not, of course, will depend on what you’re serving with or over the pasta. For my purposes, it worked out fine.

Work your ingredients together with a fork, as I say, and then with your hands to form, ultimately, a ball. Place the ball of dough on a floured pastry board, cover, and let it rest. Don’t ask me why. Just do it. All the recipes say to do it, and you can wash your hands and the bowl and sit down for a while with a book, satisfied that you will be serving homemade noodles for supper! You are doing something, you see, even when you’re not doing anything! Don’t you love that kind of cooking?


Okay, after the dough is rested (20-30 minutes, and you can put it in the fridge if you want, but I never do), it’s time to roll it out flat. Use a rolling pin — or a wine bottle, if you don’t have a rolling pin. I used a wine bottle here in the ghost town cabin until very recently, and it worked fine, but I have to say I feel very “uptown” now with a genuine, beautiful, wooden rolling pin. And a nice big wooden board! 


You haven’t done anything wrong when the dough resists being rolled out, so don’t worry. That’s just how pasta dough is, wanting to shrink back up, and you have to keep at the rolling, putting your shoulder into the rolling, as it were. I’m sure the dough’s resistance has something to do with gluten, but I’m not one of those cooks who needs scientific explanations. If you are, search it out for yourself.

How thin you roll the dough will — obviously, right? — determine the thickness of your noodles and how long they’ll take to cook. In our household, we like them full-bodied, tending toward spatzle. Cut the dough into strips with a sharp knife and drape it — hang it — somehow — to dry. I draped as many strips as I could fit on a cooling rack and the rest on an overturned steamer. Think of them as laundry hanging up to dry. In fact, if you had a wooden clothes rack, that would hold a lot of nice, long noodles! 


Now you can either let the pasta strips dry until brittle and store them in jars (for storage or gift-giving) or cook them while still limp, as I did the other evening. 


These homemade noodles aren’t fancy, but they are very satisfying comfort food, with nothing more than butter and salt. Also good with gravy, of course. Grated cheese is always an option. And oh, can you imagine making sweet noodle kugel with homemade noodles and how good that would be? Some other time, for company, maybe….


We happened to have one last little leftover birthday steak in the freezer, so thin slices of steak (cooked rare ahead of time) joined onions and mushrooms, with sour cream stirred in at the end, all of it served atop the hearty homemade noodles.

It’s possible, of course, to increase the amounts of your ingredients to make more noodles at a time, but the amounts I’ve indicated make plenty of pasta for two people, and when you realize how much satisfaction there is in making noodles at home, you won’t want to make too many at once — because that would deprive you of another satisfying noodle-making day, and you want to leave plenty of those for days to come. 


Comfort in the making and comfort in the eating -- just what we need these days at home, isn't it?


Wednesday, March 18, 2020

Back to the Soup Pot: Rustic Cheesy Cauliflower

The humble cruciform beginning

Heady with the success of my savory sweet potato pie, and with a big, beautiful cauliflower head on hand (the grocery store was all out of broccoli the last time we went), once again I began searching for something new and interesting to make in the kitchen. And once again, each recipe I found was not quite, not exactly, what I had in mind. But I had already uttered the fateful words “cauliflower” and “cheese,” and the Artist was all ears. Could we please call it cheesy cauliflower? And could we have it tonight? So with ideas gleaned from various recipes and a picture in mind of the final result I wanted, I set to work in the Arizona ghost town version (much roomier) of my tiny Michigan farmhouse Paris kitchen.

Not really a secret, is it?

Here is a not-very-secret “secret” I’ve shared before in this blog: Better than Bouillon. I grew up in a household that used a lot of bouillon cubes, and I’ve gone through plenty of them in my adult life, too, but BTB (as I call it for short on my shopping lists) was a revelation, and once I brought that first jar home, there was no going back to the cubes. So stocking up the cupboards for a possible quarantine — and already, now, for a lot of staying home — meant having both chicken and vegetable BTB on hand for home soup-making. There is also a beef BTB. Tip: When you get down to the bottom of a jar, always swirl some boiling water around and make sure you don’t waste a bit!

Ingredient list: Chicken Better Than Bouillon, carrots, cauliflower, onion, chili powder, garlic salt, cheddar cheese, bacon, nutmeg
(I used half the head of cauliflower, three very large carrots, and a medium large onion but did not measure other ingredients.)

Oh-oh! Don't forget the carrots!
So cauliflower and BTB were the base, but I liked the idea of carrots, which one recipe I saw included. The Artist thought I could leave those out. He can take or leave carrots. Oh, no! Those carrots were going in! And they went in first, before the cauliflower and sautéed onions, because they would take the longest to cook nice and soft. I should have (but didn’t) get a shot of the carrots in the broth by themselves, because the rich color they impart goes a long way toward explaining why you shouldn’t leave them out.

Vegetables "getting good," as my Grandma would say

And here’s where I have to make an embarrassing admission: although I have two immersion blenders at home in Michigan (one I bought, one a gift from someone who didn’t think I would buy one for myself) … and could have brought one of them to Arizona … and actually considered bringing one — there is no excuse! — for some cockamamie reason I’ll never be able to retrieve from memory, I did not  pack a blender when we left our Northport farmhouse! I do not have a blender here in the Arizona ghost town where we are wintering. I do not even have an eggbeater — because do you know how hard it is to find an eggbeater now when everyone uses blenders instead? 

But I did add a potato masher to the kitchen recently, a nice hand tool that requires no electric power and does not need to be stored on top of the counter. My soup, then, of necessity, would be rough in texture rather than creamy. Rustic, right?

Recap: Simmer carrot slices in chicken stock or bouillon. Add cauliflower and sautéed onions and continue the simmer. Add more stock if needed. Add some garlic salt and chili powder at this stage. When all these are cooked nice and soft — and I let mine bubble away for an hour or two; you’re going to mash or blend them, so you can’t overcook the vegetables — use your potato masher to mash them to a pulp or throw everything, a bit at a time, into a blender if you want to go that route. But if you blend it, you’ll have a creamy soup, not what I’m calling a rustic soup. 

Finally, add in as much grated sharp cheddar cheese as you like and stir until smooth.

Last step is thickening. It’s like making gravy. Stir together a heaping tablespoon (not level — heaping) of flour and enough cold water to make something more watery than a paste. No lumps, please. Then add a generous ladleful of your soupy vegetables to the cold flour-water mixture, stir it well, and add it back to the soup. Stir well. 

Now leave the soup on low heat while you cook up a couple strips of bacon. These are just garnish, so don’t go overboard.

The final touch, not to be omitted!

Last touch before serving is freshly grated nutmeg. It is so satisfying to grate nutmeg! If you don’t have whole nutmegs or a grater with that necessary fine option, ground nutmeg will do, but don’t forget the nutmeg. Like the savory sweet potato pie of the other day, this is definitely a soup I’m putting on the menu of my imaginary restaurant!

You won't believe how good it is!